
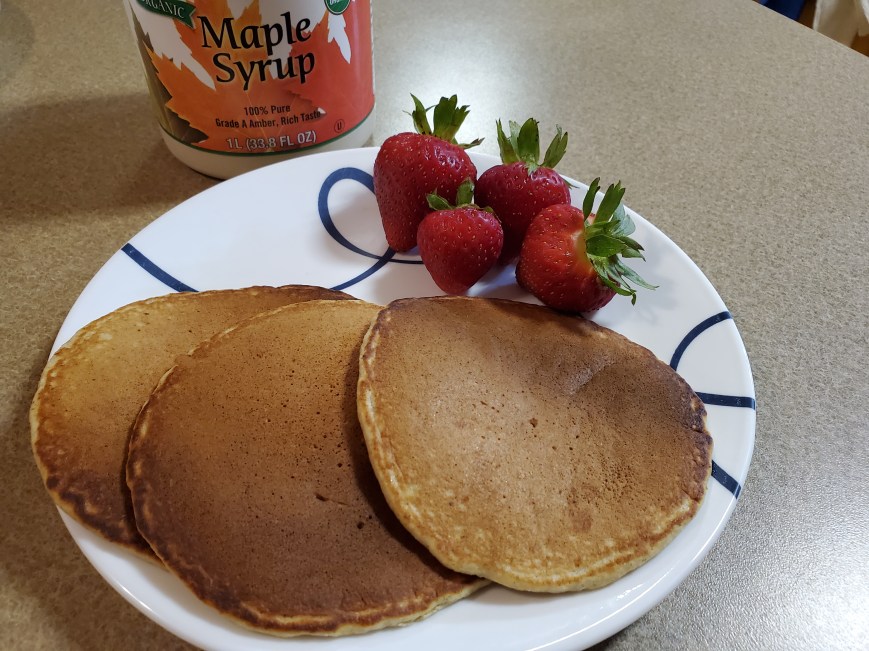
CHECK OUT OUR RECIPES PAGE FOR MORE GREAT RECIPES!!! Not to toot my own horn…but these are AWESOME!! You won’t even miss the butter, either!(Psst….If you enjoy this recipe, be sure to get yourself a copy of our additive-free cookbook & grocery shopping guide, “Eating Additive-Free“! It’s stuffed with 150+ more tasty recipes!! Your satisfaction is guaranteed…or your money back!)Makes about 15 pancakes.
INGREDIENTS:
2 3/4 cups gluten-free oat flour*
1 TBSP baking powder (look for brand that’s gluten-free and aluminum-free)
1 tsp sea salt
1 3/4 cups water
2 eggs
1/4 cup grapeseed oil (If you can have dairy, feel free to use softened butter here instead.)
1/4 cup honey*You can make your own oat flour by grinding approximately 3 cups of old fashioned oats, but be sure to measure out the precise amount of flour needed for this recipe in case yours makes a little more or a little less than needed.**Check out our Grocery Shopping Guide for our tips on selecting the most additive-free versions of every ingredient used in our recipes.
DIRECTIONS:Preheat non-stick griddle to 375 degrees.Grind oats into a flour if using whole oats (we throw ours in our blender). Mix all dry ingredients together in a medium mixing bowl – a whisk works great for this…really breaks up the clumps. Mix wet ingredients together in a separate bowl.Stir wet ingredients into dry ingredients until just combined – it’s okay if the batter is a bit lumpy. Don’t over-mix or pancakes will be tough.Test that skillet is fully preheated by sprinkling some water on it – the droplets should “dance” and sizzle.Using a 1/3 cup measuring cup, scoop batter onto the skillet. Pancakes are ready to flip when the edges are slightly dry and the top is covered in bubbles (peak underneath to make sure the bottom is golden brown before flipping).Flip pancakes and cook until underside is golden brown – do NOT flip more than once or flatten the cakes with your spatula. These pancakes rip easily. To keep them from tearing, be sure to slip your spatula under them in one smooth, really quick motion …and you may wish to wipe your spatula clean between batches, as well. Serve immediately or store in fridge/freezer for reheating.I enjoy these plain (I’ve never really enjoyed syrup) – these really are sweet enough to hold their own 😉 Obviously, if you’re not “dairy-free,” feel free to spread butter all over them – I’m sure that’d be delicious! Otherwise, top with pure maple syrup or raw honey!CHECK OUT OUR RECIPES PAGE FOR MORE GREAT RECIPES!!!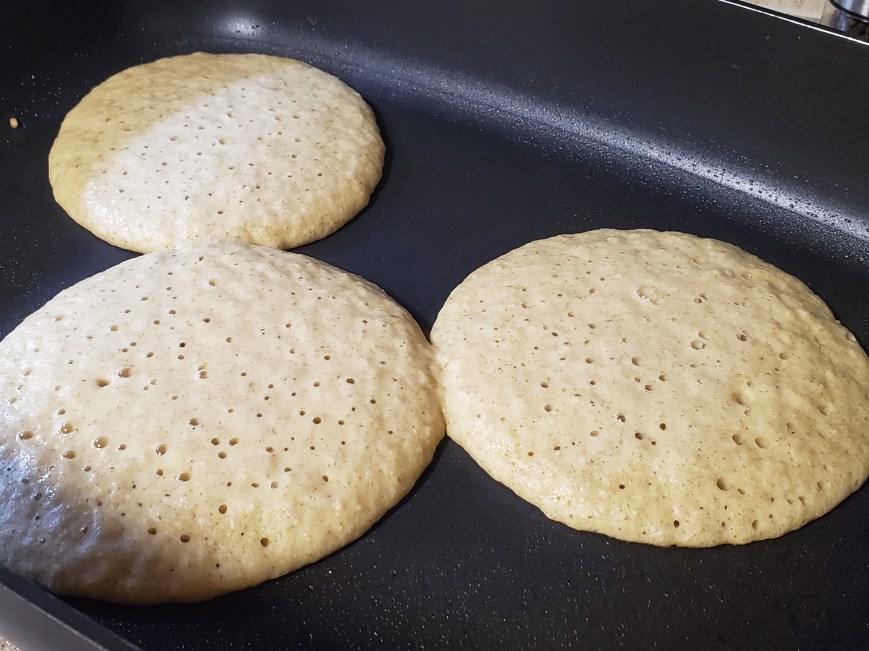

Tag Archives: oats
“CHOCOLATE CHIP” CHEWY GRANOLA BARS (gluten/dairy-free)

CHECK OUT OUR RECIPES PAGE FOR MORE GREAT RECIPES!!!
These bars are chewy and delicious, but not too sweet. They can easily be made gluten-free and/or dairy-free to suit your needs.
INGREDIENTS:
4 cups Old Fashioned Oats (we use a gluten-free variety)
1/3 cup coconut oil (or butter)
1 cup raw honey
4 tsp pure vanilla extract
1/4 tsp sea salt
1/8 tsp ground cinnamon
1 1/2 cups almonds, chopped (we throw them in food processor)
1/2 cup cocoa nibs (optional), available at health food stores
DIRECTIONS:
Preheat oven to 350 degrees.
Place oats on an ungreased 11″ x 17″ baking sheet and toast in oven for 10 minutes, stirring every 3-4 minutes.
Meanwhile, melt honey and oil or butter together in a medium saucepan over medium heat, being careful not to burn it. Remove pan from heat; and add vanilla, salt and cinnamon. Stir until dissolved.
Add toasted oats to the saucepan mixture and toss to coat. Add chopped almonds and stir. Add cocoa nibs (optional) and stir to combine.
Line a smaller baking sheet (10″ x 15″ works best) with parchment paper. (Tip: Sprinkle the sheet with a few drops of water, first, to help keep the paper in place.)
Transfer batter to this cookie sheet and gently spread to all edges. Once entire sheet is covered, press batter firmly into pan – I use a Ziplock sandwich bag on my hand for this step, but a sheet of parchment or wax paper should work well, too.
Bake 8-10 minutes at 350 degrees. The bars are done when they just begin to turn brown at the edges. Don’t wait too long or they may burn! Bars will be moist and crumbly when removed from oven, but they come together as they cool! It may take a few attempts for you to figure out the best amount of time in your own oven.
Let cool completely (about 90 minutes on a cooling rack; longer if you don’t have a cooling rack). Cut into 24 bars and remove from pan. Enjoy!
We like our bars a little firmer and sweeter, so we store them in the fridge. They also freeze well for later use…and can be eaten frozen, as well!
(For more great recipes and all of the grocery shopping tips you need to ensure that you select the most additive-free versions of every ingredient you need to make over 150 natural recipes, check out my e-book “Eating Additive-Free“!)
Gluten-Free QUICK Oats!!
 About a year ago, I was on the prowl for some gluten-free oats, but I could only find the “Old Fashioned” variety, even online. It was brought to my attention the other day (thanks, Pam) that Bob’s Red Mill brand does now carry certified gluten-free QUICK oats! Yay!
They’re available online, but if you live in Omaha, I did find some at the Baker’s on 132nd & Maple Streets (in the “health food” section) yesterday – WAY cheaper than paying shipping for an online order! I also found them at Whole Foods – regular price $6.99, but on sale now through June 28, 2011 for $5.98! I haven’t tried them yet, but will let you all know how it goes…
I’ll also let you know if I find them anywhere else in Omaha! If you know of another retailer that carries the QUICK variety, please leave a comment below. Thanks!
