
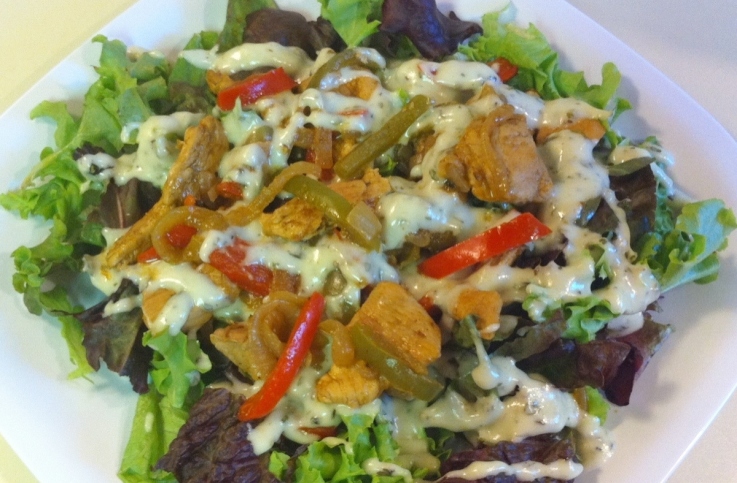
Chicken Fajita Salad

chickenfajitasalad

CHECK OUT OUR RECIPES PAGE FOR MORE GREAT RECIPES!!!

Serves 6

INGREDIENTS:

1-2 TBSP olive oil or coconut oil
1 1/2 lbs boneless, skinless chicken breasts, cut into thin strips
1 green bell pepper, thinly sliced
1 red bell pepper, thinly sliced
2 medium onions, cut in half and thinly sliced
4 tsp chili powder
4 tsp ground cumin
1/4 tsp garlic granules
1/4 tsp freshly ground black pepper
1/8 tsp cayenne
1/2 tsp sea salt
6 servings lettuce, chopped

*Grab yourself a copy of our Grocery Shopping Guide for our tips on selecting the most additive-free versions of these ingredients.

DIRECTIONS:

Heat oil in a large skillet. Brown chicken on both sides and sprinkle with salt/pepper. Add dry seasonings and stir.

Add veggies and stir. Cover and cook over medium heat about 10 minutes until veggies tender; stir occasionally.

This salad is delicious topped with this homemade Creamy Italian Dressing! Mmmm….mmmmm…mmmmm!!!

(Psst….If you enjoy this recipe,  be sure to get yourself a copy of our additive-free cookbook & grocery shopping guide, “Eating Additive-Free“! It’s stuffed with 150+ more tasty recipes!! Your satisfaction is guaranteed…or your money back!)
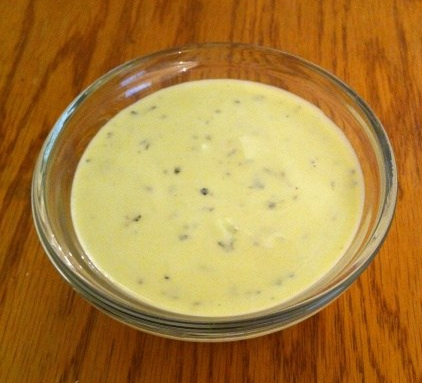
Creamy Italian Dressing

creamyitaliandressing

Use extreme caution with this recipe…it’s addictive!!! LOL!

Chad and I developed this recipe years ago when we were working as personal chefs. One of our clients, Donna, wanted a Creamy Italian Dressing to pour over the Taco Salads we would make for her. And, boy, am I glad she did… because I had always used our tasty Homemade Catalina/French Dressing on Taco Salads… and now I have two super scrumptious ways to enjoy my taco salads!!! (Thanks, Donna!!!)

CHECK OUT OUR RECIPES PAGE FOR MORE GREAT RECIPES!!!

Serves 4

INGREDIENTS:

1 cup Homemade Mayo (or additive-free store-bought mayo)
1/8 cup raw apple cider vinegar
3/4 tsp raw honey
1 TBSP water
1/4 cup grapeseed oil or olive oil
3/8 tsp garlic granules
3/4 tsp onion granules
1/2 TBSP dried oregano
3/4 tsp dried parsley
1/4 tsp freshly ground black pepper
1/4 tsp dried basil
pinch of dried thyme

*Grab yourself a copy of our Grocery Shopping Guide for our tips on selecting the most additive-free versions of these ingredients.

DIRECTIONS:

Prepare homemade mayo. Stir remaining ingredients into the mayo.

Store in fridge, and it will thicken within a couple hours. This dressing tastes best after it sits for 4-24 hours in the fridge.

(Psst….If you enjoy this recipe,  be sure to get yourself a copy of our additive-free cookbook & grocery shopping guide, “Eating Additive-Free“! It’s stuffed with 150+ more tasty recipes!! Your satisfaction is guaranteed…or your money back!)

Oh, and this dressing is also SUPER yummy over our Chicken Fajita Salad!!! (Recipe coming soon!) Mmmmmm….

chickenfajitasalad


“Better-than-Reese’s” Bars

better than reeses bars

CHECK OUT OUR RECIPES PAGE FOR MORE GREAT RECIPES!!!

Shout out to my Mom for passing along this recipe to me years ago! Pretty sure mine NEVER turn out as good as hers did, but BOY did we look forward to these whenever she made them for us as kids!!! Mmmmmmmmm!!!!

(Psst….If you enjoy this recipe,  be sure to get yourself a copy of our additive-free cookbook & grocery shopping guide, “Eating Additive-Free“! It’s stuffed with 150+ more tasty recipes!! Your satisfaction is guaranteed…or your money back!)

Makes 24 bars

INGREDIENTS:
2 sticks (1 cup) butter
1/2 cup white sugar
1/2 cup brown sugar
3 cups quick oats
3/4 cup peanut butter (creamy or chunky)
3/4 cup semi-sweet chocolate chips

*Check out our Grocery Shopping Guide for our tips on selecting the most additive-free versions of these ingredients.

DIRECTIONS:

Preheat oven to 350 degrees.

Grease a 9″ x 13″ cake pan.

Melt butter in a medium saucepan over low heat. Add sugars and stir to combine. Add oats and stir to combine.

Press the oat mixture evenly into the pan.

Bake until golden brown (about 15 minutes…but REALLY watch it the first time because it took less than 10 minutes in my toaster oven!)

Allow oat crust to cool completely (about 30 minutes).

Then, melt peanut butter and chocolate chips together in a small pan over low heat.

Spread chocolate evenly on top of the oat crust.

Cool completely before cutting and serving (about 1 1/2 hours in the fridge).

We prefer to store these in the fridge to keep the chocolate topping a bit firmer. Otherwise, it will stay softer (more like frosting). Either way….YUM!!!! Enjoy!

These freeze well, too!

CHECK OUT OUR RECIPES PAGE FOR MORE GREAT RECIPES!!!

ringbinderstanding


Simple Tricks to Help You Face Your Fears!

fear

Ever wish you could break free and just face your fears?

Once we sold our home to travel full-time in our RV, we started encountering new experiences on what seemed like a daily basis! And it really became more and more inconvenient to live in fear…especially once there were so many new things that made me fearful.

Fear became one of my worst enemies, always lurking…constantly threatening to make me miss out on potentially wonderful experiences.

I’m still a work in progress in this regard, but one way I’ve started conquering some of my fears is by adopting the following super simple 4-step strategy:

1. Realize that I’m afraid of “X”.

2. Ask myself if I want to remain afraid of “X.”

3. If the answer is “no,” then I ask myself what I would do if I were NOT afraid of “X.”

4. Then I go ahead and do THAT!

I know it sounds too simple to be useful, but it works! I think it works, perhaps, because it reminds me that being afraid is a choice!!!

And then I realize that I can’t really sit around feeling sorry for myself because I’m afraid…because I am the one deciding that it’s scary.

And, honestly, I’m just sick of being afraid of things!!!

This little trick works for physical fears (for example, I’ve been conquering fears of heights, bridges, etc.) or psychological fears (like speaking in front of crowds for example) or any kind of fears you may have.

Are YOU tired of living in fear?! Then, I’d love for you to give this little trick a try and let me know how it goes! Oh, and be sure to check out my videos below for more great tips for dealing with your fears! 

And if you haven’t already, be sure to subscribe to my blog for more tips for living the healthy, happy life you soooooooooo deserve!